
Grasshopper-CEA Part 3: Exporting GH geometries to shapefile
In this post, I am going to introduce how to export GH geometry to shapefile using a GH plug-in called GHSHP (by Hiteca).
Installation
Please follow the next steps as I quote from the GHSHP installation guide that you can find here.
Install GhPython and you can find it here.
Download pyshp-1.2.12.zip.
Extract pyshp-1.2.12.zip and copy shapefile.py to “C:\Users\%USERNAME%\AppData\Roaming\McNeel\Rhinoceros\5.0\scripts”
Download and extract master.zip.
In Grasshopper, choose File > Special Folders > User Objects folder. Save the two .userobject files from master.zip into this folder.
Restart Grasshopper and you can find the plug-in installed (Hiteca) under the Tab Extra.
It looks like this:
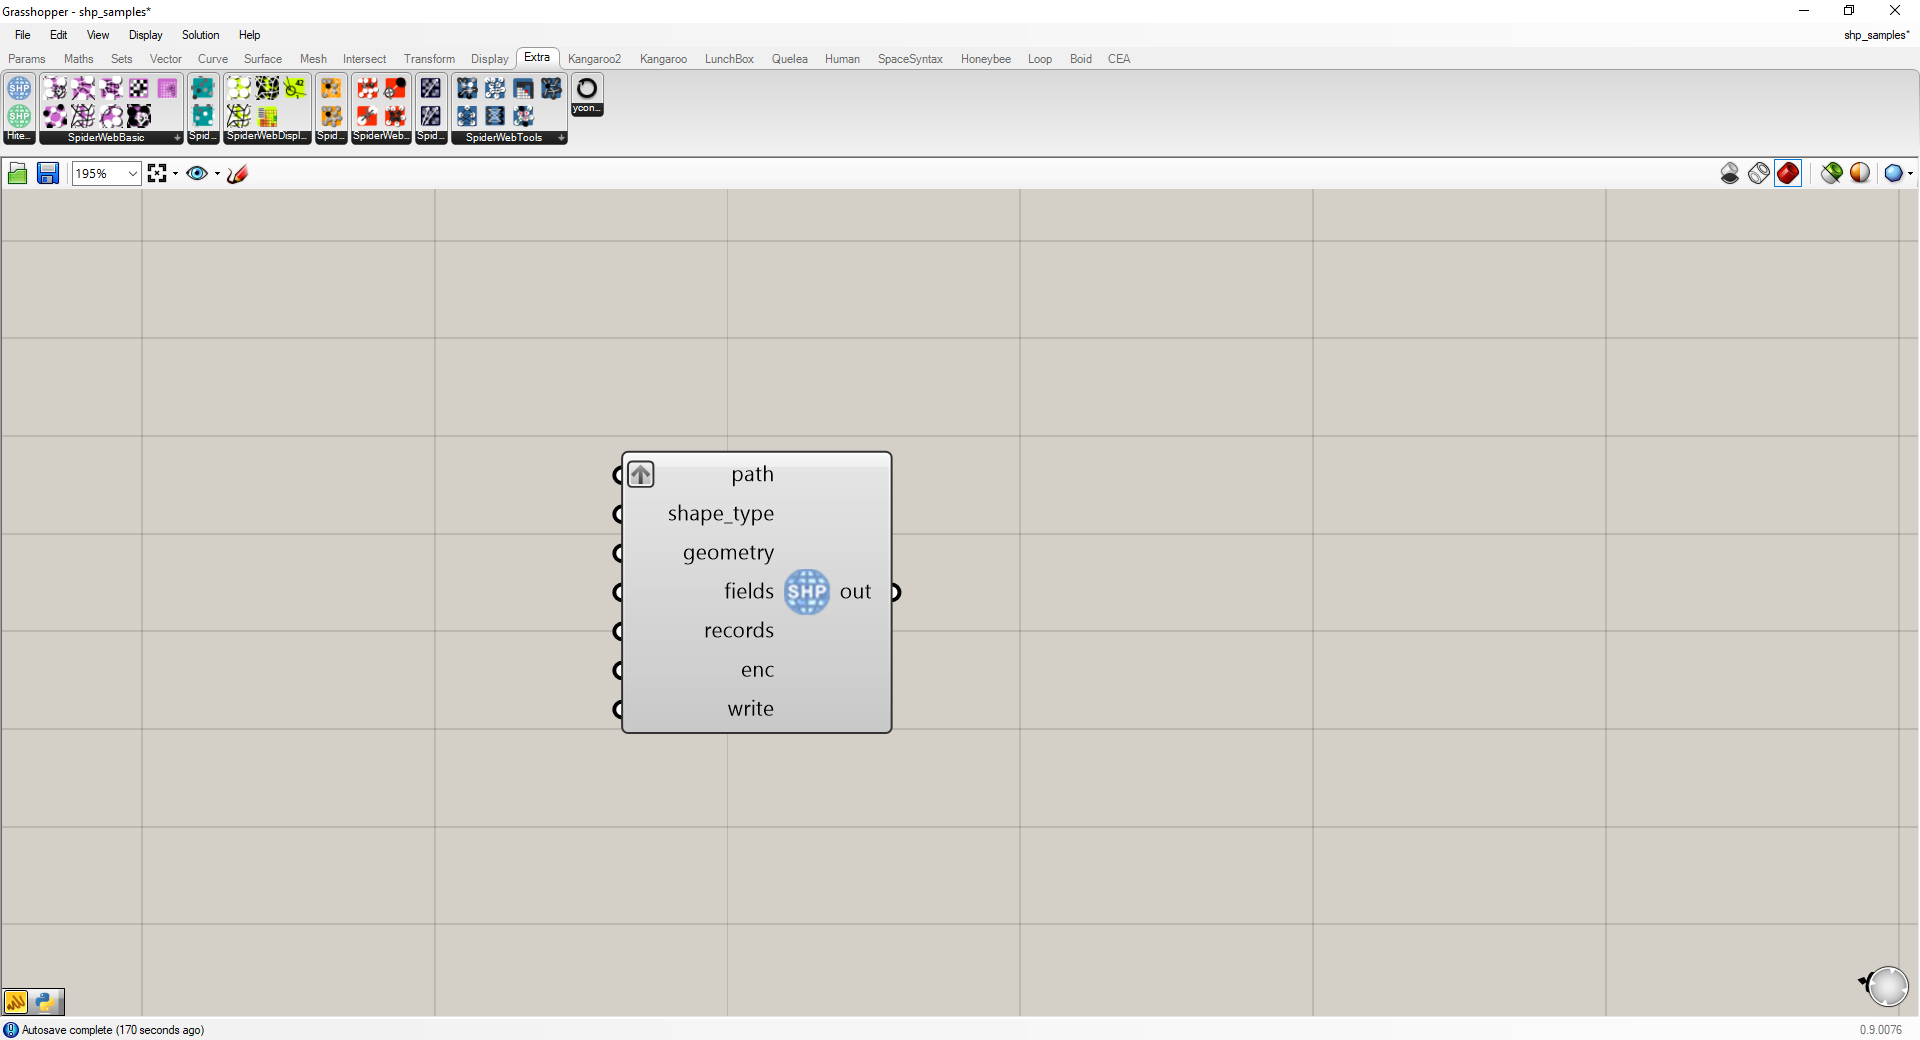
The GHSHP component on Grasshopper Canvas.
Executing the export
The inputs for the GHSHP - export are explained as follows.
path - the path of the output file should look like this “…\cea_project_folder\inputs\building-geometry\zone.shp “.
shape_type - in CEA, we use polygons (=5) for building footprints and polylines (=3) for street center lines.
geometry - the GH geometries to be exported in shapefile.
fields - the headings of the field which have to follow exactly the CEA requirement. The inputs to the components follow the format of “name;type;length“. The “type“ in CEA includes “C“ for texts (e.g. “Building_001“) and “F“ for floats (e.g., 3.5).
records - data for each geometry and field in the attribute table.
enc - leave blank and use the default “UTF-8“.
write - connect to a toggle or button to trigger the execution of the component.
The following image gives out an example of exporting a zone.shp:
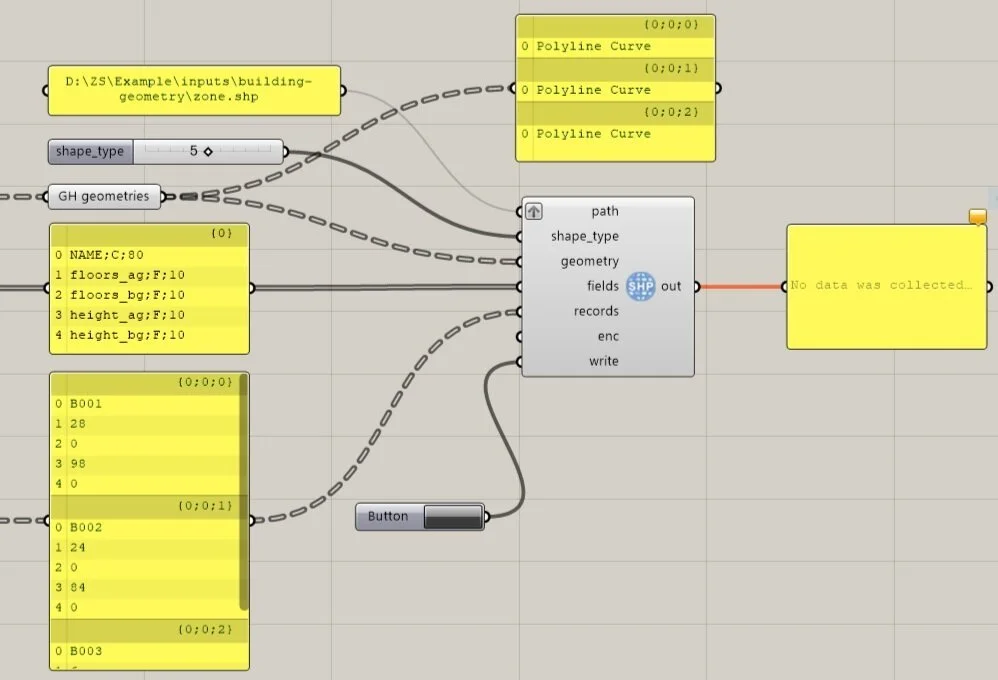
An example of exporting zone.shp
Next
In the next post, I am going to introduce one research initiative on urban design for higher energy system efficiency we have been working on with Grasshopper and CEA.
Should you have any questions, please write them down in the comment section below. Thanks.